Wednesday, March 27, 2013

Happy Hearts (Practical Scrappers)

 
Who's happy today?  I am!  Why?  Because PRACTICAL SCRAPPERS has a new sketch reveal by Liz Chidester that is featured on today's blog!  And if that isn't enough to get you motivated, I think all the wonderful layouts we girls created are sure to inspire you!  (If I do say so myself)
 
I LOVED this month's sketch, even though I didn't follow it exactly - and that's okay because it means that I can play with it again!  Here is my layout, featuring my baby boy and his favorite gal (besides his mama):


I used wonderful papers by AMERICAN CRAFTS - I am loving evey single one of their new collections that have been released recently.  I cut out my background shaped heart paper using my Silhouette and then sewed and glued the leftover hearts on my stitched circle. 
 
 
I also L-O-V-E-D these vellum hearts that I found at Archiver's a few weeks ago.  More heart shapes from my background "heart paper" were glued on the little arrow at the bottom of this picture.
 
Thanks for stopping by!  That's it for me today, but be sure to head over to PRACTICAL SCRAPPERS and leave a little love!  And, of course, you can ALWAYS leave a little love for me here, too!

Friday, March 22, 2013

Junque Mini Album (Pretty Little Studio)

 
It's Friday!  Let's all give a great big Texas "Yeeeeeeeeeeeehaaaaaaaaw!"  And to celebrate, I want to show you this super fun Junque (that's junk spelled the fancy way, don't you know) Mini-Album that I created for PRETTY LITTLE STUDIO!

First, can you guess what my pages were made from?  Each and every one of them, except for a couple of the journaling tag inserts, was created from my packaging that my Pretty Little Studio supplies came in.  That's right, I even used the cellophane wrappers - nothing went to waste - my Grandmama would be so proud of me!

Now, for details and instructions on how I made this mini-album, check me out on the PRETTY LITTLE STUDIO BLOG.  And, hey, leave some love over there while you're at it please - pretty please?  Pretty please with a cherry on top???

Okay, enough talking from me - I am just going to sing along with Rebecca Black in my head and show you my junque pages.  When I tell you I had fun making this album, I am not exxagerating.  Wait, exaggerating???  Hmmm...e-x-   uhhhh...Anyway, I had F-U-N - so much, that I just kept making one page after another!  Here they are:

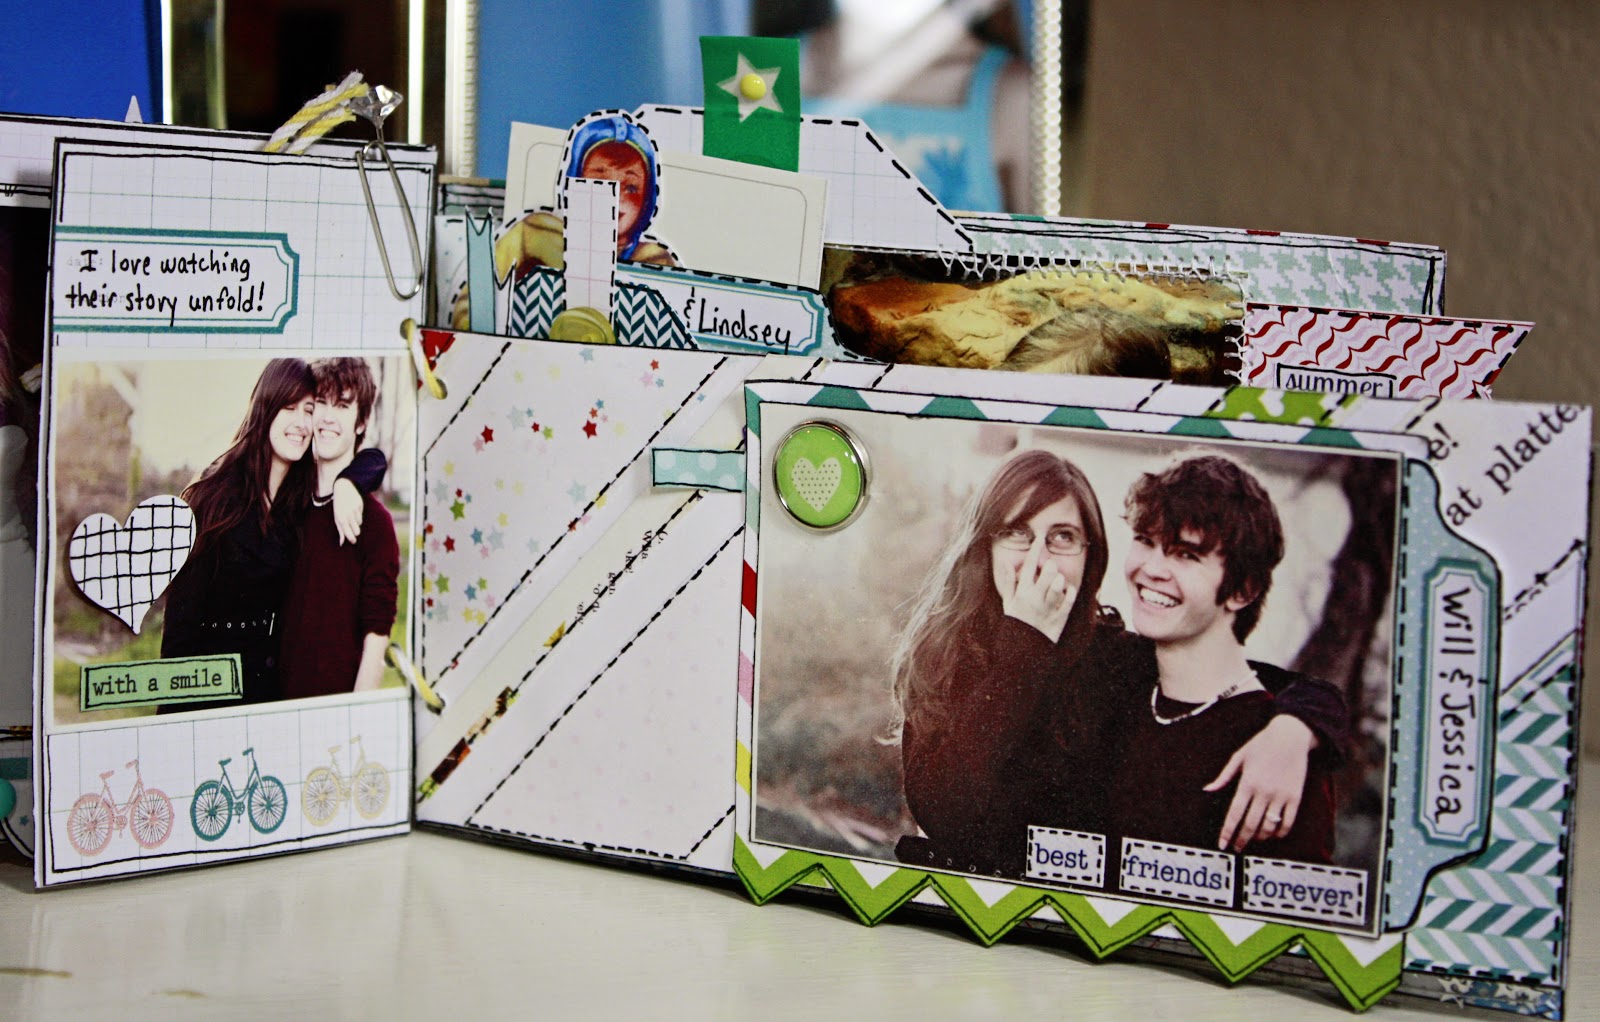
Yep, that's my goofy face giving the big cheesy grin.  I was going to a crop with some friends, though, so can you blame me?  See my tag that seems to be just attaching itself to the insert next to it?  It's actually in a pocket made from my cellophane wrapper - kinda cool, huh?

Page Two is my son and his girlfriend - cutest young couple ever.  Seriously.

Page Three - that's my Hunterific girl.  She's so shy and reserved - not!  I don't know about you, but I LOVE that PLS paper with the bright yellow hearts.  It makes my heart happy just looking at it!

Page Four - Look!  Is it a snow globe or a mini-album page?!?!?!  I had SO.MUCH.FUN. making this page! (When you say so much fun in capital, bolded letters with periods in between each word, you know it's a lot of fun!)

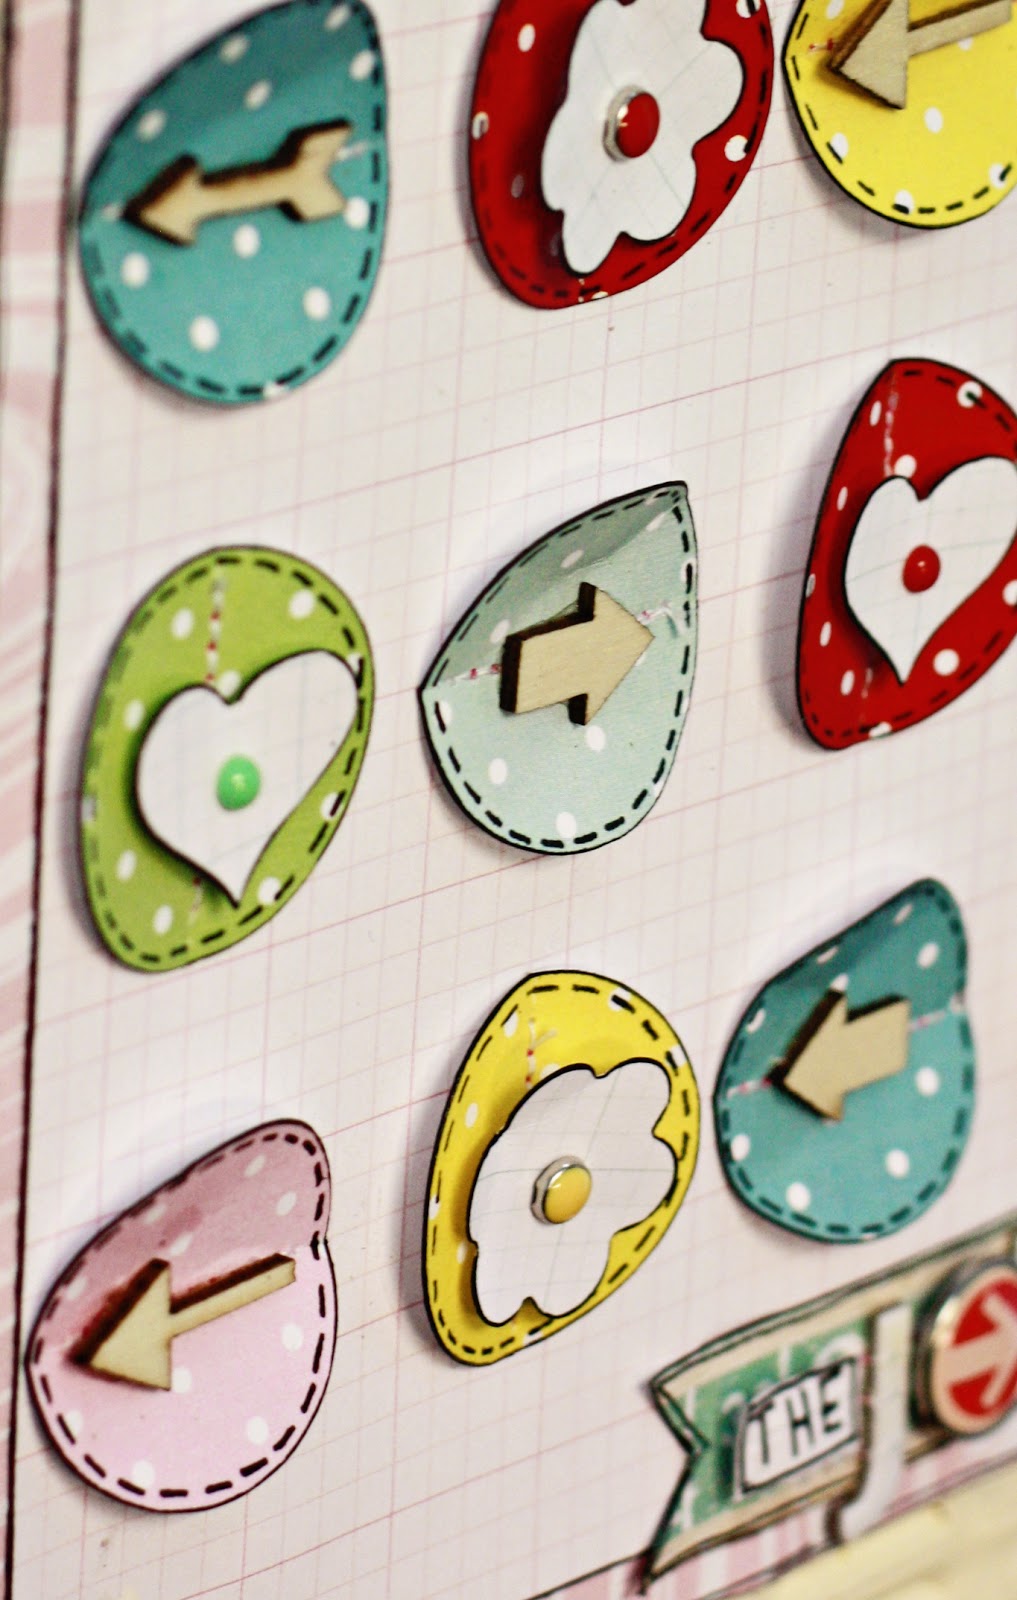
Page Five - I loved digging out my stickles and cutting off a few pom poms from my ribbon and trim stash to decorate this page!


Page Six - nope, not done yet!  Told you I had a lot of fun making this album...

Page Seven - I love all these vintage tags that PLS makes!

Page Eight - I used a little piece of wax paper in front of my paper for this insert - I just liked the extra layer it added...

Page Nine - A super double feature about the man who stole my heart! I glued the football player to my word card (both made by PRETTY LITTLE STUDIO, of course) and traced around it with my marker to make it look like a vintage paper doll.

Page Ten (almost at the end)...

Anddddd...the very last page.  Whew! *wiping sweat off brow*

That's it for me today!  Heading off to work now - but I hope I have inspired you to take your ordinary junk and turn it into JUNQUE!

Peace, love, and art my friends -

Thursday, March 21, 2013

Taking it Off the Book with Pretty Little Studio

 
Happy almost Friday everyone!  I am up with two other wonderful ladies on the PRETTY LITTLE STUDIO Blog today - featuring our projects created for this week's OOTB challenge.  I knew I wanted to create some kind of artwork but I wasn't quite sure what - other than I knew I would be using my polka-dotted garland pieces!  Then, when I was doing a little retail therapy at one of my favorite stores, I passed by a two-dimensional photo for sale that was pretty enough to warrant a second look but waaaaay too over-priced.  So, I decided to put my money where my mouth is and make my own  artwork! See the mitered corners of my pink paper I am using as a  mat?  I totally stole borrowed that idea, with permission of course (cough-cough), from my friend Christine.  I think it turned out super cute, don't you?" 

Wanna see a couple of close-ups?  Here you go:

My circles...


The bottom part of my title, which I machine stitched acrosss.


That's it for me, but be sure to stop by the PRETTY LITTLE STUDIO BLOG to admire everyone else's wonderful work!

Monday, March 18, 2013

Don't You Love My Silhouette (Practical Scrappers)

Happy Monday, everyone!  To get my week started right, I stayed up until the late, late, late hours of the night working on this project for PRACTICAL SCRAPPERS where the On Trend Team and a few other PS members (like me) got together and showed what fun things can be done with a Silhouette Cameo. 

My ideas were pretty simple - but the good thing about using my Cameo is that just about EVERY project is simple!  I had it cut two rows of arrows in my AMERICAN CRAFTS background paper. Then I placed fussy cut arrows next to each row that I machine stitched to my paper.

 
The next thing I used my Silhouette Cameo for was my bouquet of flowers.  Van Gogh may have created the Starry Night, but I believe I have now created the Starry Bouquet!  The star file I used had a slightly warped shape, which I then accentuated by stretching the stars out - making them look more flower like.  I pop-dotted them for more dimension and drew the stems connecting each flower to my vase.  The vase was fussy cut, also pop-dotted for more dimension, but then the edges were glued down.  I outlined each star flower in white and placed a little shiny metallic star in each center.
 
 
That's it for me today (yawn) - now I think it's time for a nap!  Of course, I am at work so that may have to wait...

Friday, March 15, 2013

Im-Practically Scrapping with Practical Scrappers

 
Yeah - it's Friday!  And that means the weekend is almost here!  And THAT means I will have time to sit down and do a little crafting - I have so MANY plans floating around in my craft-loving little brain already!
 
Today, I am up over at PRACTICAL SCRAPPERS with a quick post about creating layouts for no particular reason.  I used this picture of Lula that I had taken with a bajillion others.  I had already used other photos on layouts where I journaled about the day and how I feel about her, so I really didn't have a single thing to say about this picture.  But I liked it, and I wanted to use it, and that is exactly what I did.  I think sometimes we get so caught up in being "responsible scrappers" who tell our stories and preserve our memories - which is a wonderful thing to do - but it really is okay to create a layout just because! 
 
I used wonderful PEBBLES papers from the Seen and Noted Collection (which I l-o-v-e).  (By the way, they have a new Sketchy Thursday sketch up by Becky Fleck, so if you are a sketch lover like me, go check it out!)
 
That's it for me today.  Got to jump in the shower and get ready for work.  But I will be back in a few days with a super cute home decor project I created for PRETTY LITTLE STUDIOS - I can't wait to show you!  Until then - whether you are making memories or simply playing with pretty papers - happy crafting my friends!

Saturday, March 9, 2013

Perfectly Imperfect - Using a Less Than Perfect Photo

Happy Saturday!  I hope you are all having a wonderful day - relaxing, crafting, organizing - whatever you are doing.  I am sharing a layout that, with my busy couple of weeks, I COMPLETELY FORGOT to post!  PAPER SECRETS does a monthly challenge, which includes a great sketch with a twist.  The twist last month - to use banners, which is totally one of my favorite things to do!
 
I found this picture of Hunter that I took a month ago.  She was laying on her bed talking and joking with me. I only took one shot, and it ended up being a little out of focus - but I loved it because it reminded me of a perfect moment with my daughter.  So I decided to use it anyway - a less than perfect picture that I love about my perfectly less than perfect daughter whom I love dearly (clearly taken by a less than perfect mom/photographer!).  I used wonderful PEBBLES papers from the Seen and Noted Collection, which are so bright and cheerful and perfect for a layout about my favorite tween!

My title/journaling was mainly hand written strips of paper which were cut out and outlined in marker. 

 
I machine stitched just about every place possible on this layout - and what I didn't machine stitch, I doodled on.


That's it for me, today.  Be sure to stay tuned as I expect a rare sighting of a Krissy Clark McKee two-page layout to make an appearance next week!

Monday, March 4, 2013

From Trash to Treasure (Pretty Little Studio)


Happy Monday everyone!  I am hoping to start your week off on a fun note by sharing this project I made for the great folks over at PRETTY LITTLE STUDIO.  I brought this sad little wooden crate about a year ago at a yard sale (see see how sad it was, just check out the PLS Blog) for nothing.  It was sitting in my closet the entire past year waiting for just the right project to come along.  Well, let me tell you, as soon as I saw the wonderful papers and goodies from the SAND CASTLE COLLECTION and the BIRTHDAY CAKE COLLECTION, I knew the moment was here!

First, I painted my crate white.  Since I wasn't going to cover every piece with paper, I wanted to make sure the exposed wood parts had a pretty little facelift.  Then I measured the wood slats that I did want to cover and simply cut and glued the papers I wanted to use.   I even covered the ends, see?


A few decorations, and I was done with my crate. 


I was initially going to make some paper flowers to go inside the crate, so I purchased a bag of polised rocks at the hobby store for a few bucks.  At the last minute, though, I changed my mind (I know, huge shocker, right?) and decided I wanted to include a few family photos instead.  These wire clips and stems from an old broken picture "thingy" were perfect for holding my pics.  I clipped the wires and buried them in my rocks, then added three embellished pictures.  The best part is, because my pictures are clipped up, I can easily change them out or substitute something else in their place.

I loved backing my photos on these adorable bingo cards and adding little bits of random cuteness around them!


That's if for me today!  Be sure to check our Pretty Little Studio's BLOG because there are lots of fun things coming your way!  And if you wanted to leave a little love, too, well I certainly wouldn't object!